Mmmmmmm....
Pork Shoulder steaks, at least an inch thick, on the bone.
Granny Smith Apples
Unfiltered dry apple cider (Something nice, and english)
Large white onion
Garlic
Ginger
Raisins/Sultanas
Pat the steaks with seasoned flour and brown them for a few minutes till theres a good layer of brown bits on the bottom of the pan
Remove the steaks and set aside
Without letting the pan cool, add the quarted onions and fry them hard to caramalise, when they get some colour add some oil to cool the pan
Add a heaped teaspoon of cinamon, tumeric and cumin. Fry until aromas fill the room
Add sliced garlic and grated ginger (Lots of both) and keep everything moving so they dont burn
After about a minute add the quartered apples, followed soon after by the steaks and any juice thats come out of them.
Get everything under and over the steaks then add the cider, enough to just cover everything
Cover and leave for about half an hour on low heat
Remove lid and add raisins, cook uncovered untill the liquid has reduced slightly, then replace lid and cook for about another 30 mins.
Remove steaks and flake off meat with a fork
Crush the now softened apples to thicken the sauce and spoon this over a pile of tender meat, sprinkle with fresh coriander and apple shavings.
Serve.
Mmmm.
Tuesday 27 October 2009
Tuesday 6 October 2009
From Havana Chilli
Righto, one of my favorite chilli variants;
For 3-4 people you'll Need:
1 large Onion
3 Large Garlic Cloves
3 Dry Habanero Chillies
3 Dry Chipolte Chillies
2 Fresh Green Jalapenos
1 Tin Chopped Tomatoes
Tomato Puree
Cumin Seeds
Corinader Seeds
Cayenne Pepper
Cinnamon
Oregano
Peppercorns
Sea Salt
2 Tins Red Kidney Beans
Cubed stewing steak or beef shin (1 - 2 lbs)
Optional Garnishes:
Greek Yoghurt
Fresh Coriander leaves
Fresh Red Onion Pickle
Red Currant Jelly
Instructions:
Toast & Rehydrate the dry chillis, dice them up and retain the liquid
Toast the dry spices and grind them into a fine powder
Dice the onion and garlic, fry to soften not to colour
Add about half the spice mix and begin to fry along with half the dry chillis
When the aroma of all the spices fills the room, add the meat and stir well
Once browned, add most of the remaining spice mix, retaining about a heaped teaspoon
Fry until meat begins to caramalise a bit
Add about a can amount of the liquid you reheated the chillis in and bring to the boil
Add the tomatoes and bring to boil again, then reduce to a simmer
Cook for aslong as you can wait, at least an hour, untill the meat is like tender and soft
Thicken with the tomato puree at the same time as adding the kidney beans
Just before serving add the fresh chillis and serve with the selection of garnishes and your choice of fluffy white rice, nachos or fresh crusty bread (This is my preference) Finally you should sprinkle over a pinch of the left over spice mix to get the it right up the nose!
Should turn out really thick with little sauce and a few layers of heat and quite deep, smokey flavours. Comments/Suggestions welcome
Thursday 1 October 2009
FOOD, GLORIOUS FOOD
Right, I'm bored of this just being where I spill random tips and equations that help me with work. I'm going to start publishing all the recipes I make up and then forget too! Watch this space for some lip-smacking business. First up will be the most recent chilli, my 'From Havana' recipe :D
Friday 12 June 2009
XDCAM EX Transfer speeds
Numbers numbers numbers...
- 8GB transfer to firewire hard drive via SxS Xpress slot: 5.30 mins. 5.4x real time
- 8GB transfer to firewire hard drive via external card reader (USB) to USB drive: 11 mins. 2.7x real time
- 8GB transfer to firewire hard drive via external card reader (USB) to firewire drive: 7.30 mins 4.1x real time
- 8GB transfer to firewire hard drive via EX-3 using USB2 cable: 17.30 mins. 1.7x real time
Wednesday 3 June 2009
R3D Data rates
A few transcoded data rates for offline R3D workflow;
Tests done with 10 second raw R3D file at 235MB
Raw R3D files
At 28MB/s – 295 Minutes
At 38MB/s – 230 Minutes
Offline
ProRes HQ
Eighth Res – 2572 Minutes (3.24 MB/s)
Quarter Res – 916 Minutes (9.09 MB/s)
Half Res - 338 Minutes (24.59 MB/s)
Full Res – 114 Minutes (72.7 MB/s)
DNxHD
36
All Res – 1965 Minutes (4.24 MB/s)
115
All Res – 610 Minutes (13.6 MB/s)
No RT options in sequence?
Then one of 2 things is wrong;
Your sequence codec isnt supported for real time effects by FCP - go to sequence settings ( Cmd + 0) and change it to something that is (ProRes, DVCPro HD etc)
Or, if you have a playback card installed (Intensity, Decklink, AJA etc) then you may have the effect handling set to the card and not FCP -
o to the FInal Cut Pro > System Settings menu, then click on the Effect Handling tab. Find the codec in questions and change its handler to FCP.
Tuesday 21 April 2009
NAB New Toys Pt 1 - XDCAM HD422 / LMD
So it's that time again - the NAB Conference in Las Vegas is currently running and our two Broadcast Managers are over there 'working hard' bringing us all the news as soon as it breaks (Or as soon as they over hear the drunken ramblings of various CEOs and technical directors in the casino bars)
Sony have announced a fair whack of new high end products in the HDCAM SR range, mid and top range monitors, XDCAM HD422, PTZ Camera systems and more! Here's a run-down of our favorites;
XDCAM HD422 - PDW-F800
The new top-end XDCAM HD builds on the excellent qualities held in the F700 adding DVCAm, MPEg-IMX and 1080/23.98 as standard. introduces under & over cranking between 1 and 60 FPS (With playback capable in F700/HD1500) and an internal image converter for utilising cinematography lenses.
Sony says the new camcorder also features auto tracing white balance, output markers such as safety, aspect, and center on the HD-SDI output, slow shutter, interval recording, picture cache recording (up to 30 seconds), disc exchange cache and “shock-less” gain control.
Sony Page: http://www.sony.co.uk/biz/view/ShowProduct.action?product=PDW-F800&site=biz_en_GB&pageType=Overview&imageType=Main&category=XDCAMCamcorders
XDCAM HD422 - PDW-F1600
As the F800 is an expansion of the 700, as you can probably figure out - the 1600 builds on the F1500 in the same areas - introducing DVCAM, MPEG-IMX and 1080i23.98 standards, and with its insert/assemble editing capability, it can be used as a recorder in a linear editing system – just like a conventional VTR.
Sony Page:
http://www.sony.co.uk/biz/view/ShowProduct.action?product=PDW-F1600&site=biz_en_GB&pageType=Overview&imageType=Main&category=XDCAMVTRs
LMD Monitor Range
The mid-range production monitors are some of our favourites for colour monitoring on a budget, and the news tells us there's three updated models to look forward to:
LMD-940W - Handheld
9" 15:9 WVGA Panel
3G HD/SD-SDI, Composite and HDMI inputs
Waveform/Audio levels supported
Perfect for multi-camera or multi-standard shoot with range of inputs and portability.
LMD-1530W - Entry level LCD
15" Widescreen 1280x768 resolution
Features are brought over from LMD2030W
Has option board for HDSDI available - allowing desktop HDSDI monitoring for under £1500
LMD-2451w - Mid-range LCD
Replaces the LMD2450
Introduces 3G SDI and 1080p capabilities with second option board
Still based on same proven technology as 2450w
Sony Page: http://www.sony.co.uk/biz/view/ShowProductCategory.action?category=LMD&site=biz_en_GB
Friday 17 April 2009
Trashing FCP Preferences
Having random issues with Final Cut Pro? Then you may have corrupted your preference files by not shutting down properly, interrupting certain processes or pushing the system too hard...
1. Quit FCP.
2. Open your System Drive.
3. Set to Column View.
4. Follow the path: Users > Name > Library > Preferences.
5. In the Preferences Pane look for "com.apple.FinalCutPro.plist". Drag the FCP plist to the Trash.
6. In the same Preference Pane, look for the Final Cut Pro User Data Folder.
7. From inside the Data Folder, drag 'Final Cut Pro (v) Prefs', 'Final Cut Pro Obj Cache' and 'Final Cut Pro Prof Cache', all three shown below in green, to the Trash.
8. Do NOT empty the Trash.
9. Launch FCP and check all your settings. All FCP setting will have reverted to default. Don't forget to reset your Scratch Disk settings.
10. Once FCP is up and running, empty the Trash.
There is also a freeware tool available from digital rebellion for backing up and managing FCS preferences which handles all of the software packages, not just FCP:
http://www.digitalrebellion.com/pref_man.htm
Wednesday 15 April 2009
XDCAM EX Workflow and Install issues
The XDCAM format can throw up a few issues for those not used to the new solid-state based recording methods, but it's not as complicated as some may think - there's a few easy steps to ensure your workflow remains smooth and easy when working on Apple hardware with Final Cut Pro 6.0.3 +
A - Versions, updates, software & drivers
The first things to ensure are that your system will actually support ingest, playback and editing of XDCAM EX footage, the following are the basic requirements for Apple hardware:
OSX 10.4.11 +
Final Cut Pro 6.0.3 + (This is the version where the XDCAM codecs were introduced as standard)
Sony SXS Device driver (Enables the system to recognise the specialist SXS cards)
Sony XDCAM Transfer Tool (Provides direct import into FCP and also works as standalone import, preview and metadata tagging tool)
Card reader (Can be either an Express34 card reader, SBAC-US10 card reader or direct USB connection from the camera)
The actual system specification regarding processor, RAM and GFX can vary. Lower spec systems will support the XDCAM workflow happily, but you find sluggish performance when working with real time effects and rendering. We recommend the following for optimal performance:
OSX 10.5.6+
Final Cut Pro 6.0.5
8 Core 2.66GHz+
12GB RAM+ (Matched pairs of Kingston DDR5)
Radeon 4870HD 512MB Graphics card
Dedicated OSX & Application HDD
Dedicated scratch disk capable of 100MB/s +
HD Production monitor for colour-critical projects
If you require to view native XDCAM EX footage on a machine without Final Cut Pro then there is a codec available from Calibrated Software that will provide the codecs for Quicktime playback - but please note this will disrupt any system with FCP also installed as you already have the codecs installed.
c - Import methods
XDCAM Transfer tool - direct
The transfer tool is an excellent route for importing your footage as it will allow you to mark subclips, add metadata and review your entire card before importing a Kb of footage. This option is available within FCP under File > Import > Sony XDCAM
XDCAM Transfer tool - from image or folder copy
Our favourite way of working with XDCAM content is to create a complete copy or disk image of the SXS card before you start working, using this method you've already created a digital backup of the data which can be copied to a separate external drive, optical disc or LTO tape backup. This means if you format the card and need to retrieve some raw data again via log and transfer you can use the copy or image to do so - the same way you would if the original card was connected.
Final Cut Pro Log & Transfer
You can also install the additional Sony plugin to enable Final Cut's Log and Transfer window to recognise SXS media. This is a very similar method to the XDCAM Transfer software but doesnt require the additional software, it will still do all your transcoding to the quicktime wrapper, allow you to make subclips and add metadata before importing to your scratch
disk.
XDCAM Clip Browser
The clip browser shouldnt really be used to import footage for editing in FCP, but it's excellent for copying the entirety or part of your SXS card to the system for backup. It will negate all the issues surrounding the folder structure that can easily be corrupted by copying/moving files from the finder window.
d - Do/Don't
Split/Spanned Clips
When working with footage that has been split or spanned across two media devices then you MUST follow precise methods to import the clips correctly. For detailed walkthrough of this procedure please see the Sony Workflow document (Page 41)
Altering folder structure
If you want to copy content from your SXS cards onto a drive or optical disc for backup never - ever - alter or delete any files in the RAW folder structure as this will make it useless in any of the SXS browsing and importing tools as they read this folder structure in order to reproduce the video and its metadata correctly.
Adding files to SXS media
You can use the SXS media as a memory card device - but if you do (And its not particulary recommended) ensure you don't add anything within the BPAV folder, create a separate directory and your software should simply ignore it. Please be aware that this data may get deleted by the camera if you try to record or playback while the media is inserted.
Ejecting media
Ensure you eject your media from your workstation correctly as you would a removeable hard disk, they are subject to the same limitations and possible corruptions as normal media.
Formatting before backup
Always ensure you've backed up your cards before formatting them for re-use unless the content is never going to be needed again.
Deleting backups before project finished
If you're still editing a project it's strongly advised to keep all the raw card data incase you need to re-import any clips or import new clips you didnt grab initially.
e - Backup
Copying folder
The main thing to ensure is that, as mentioned previously, the folder structure (BPAV) is kept entirely intact. Otherwise your XDCAM and FCP import tools won't be able to read it.
Imaging with disk utility
Our preferred way to backup SXS and other SSD media is by using the disk imaging utilties. Using the disk utlity you can select the mounted SXS card and simply click 'Create disk image' and choose your compression and location. Then backup this dmg image to as many places as you wish.
f - Intermediate Codecs
There are a few reasons to work with intermediate codecs, particulary ProRes 422 HQ, to edit your XDCAM EX footage. Primarily your rendering times on the timeline and for output may become considerably quicker as the ProRes codec requires less processing power than the Long-GOP algorithm of the XDCAM compression. Please, however, bear in mind that the difference in data rate is quite considerable. XDCAM EX will always sit between 4MB/s and 10MB/s depending on settings. ProRes 422 HQ will generally be between 20MB/s and 30MB/s, thus increasing your requirements for online storage and bandwidth.
In order to work with your XDCAM EX content as ProRes you can either change your native sequence settings to ProRes, or, in your User Preferences, set your Render Codec to ProRes (This will only work with HDV, XDCAM EX & HD codecs)
h - Issues
Missing import options
You need to install one of the import tools. Preferably the XDCAM Transfer Tool from Sony
Clips won't play back - just show white?
You don't have Final Cut Pro or the correct version of FCP, please see the system requirements for more information.
Missing Easy Setups?
If you're missing the XDCAM EX and HD setup options in Final Cut you need to locate them in this folder: 'Applications/Final Cut Pro Additional Easy Setups'
When you find them in here, copy all the XDCAM options to this folder: 'Library/Application Support/Final Cut Pro System Support/Custom Settings/' Re-start your Mac and the setups should now appear in the options.
If you have any issues with your XDCAM setup or workflow feel free to give us a call for technical support on 0870 730 6999
Jigsaw Broadcast.
Wednesday 1 April 2009
XDCAM/HDV Playback in quicktime
http://www.apple.com/downloads/macosx/video/calibratedqxddecode.html
Thursday 12 February 2009
JVC's New Solid-State Camera - GYHM700
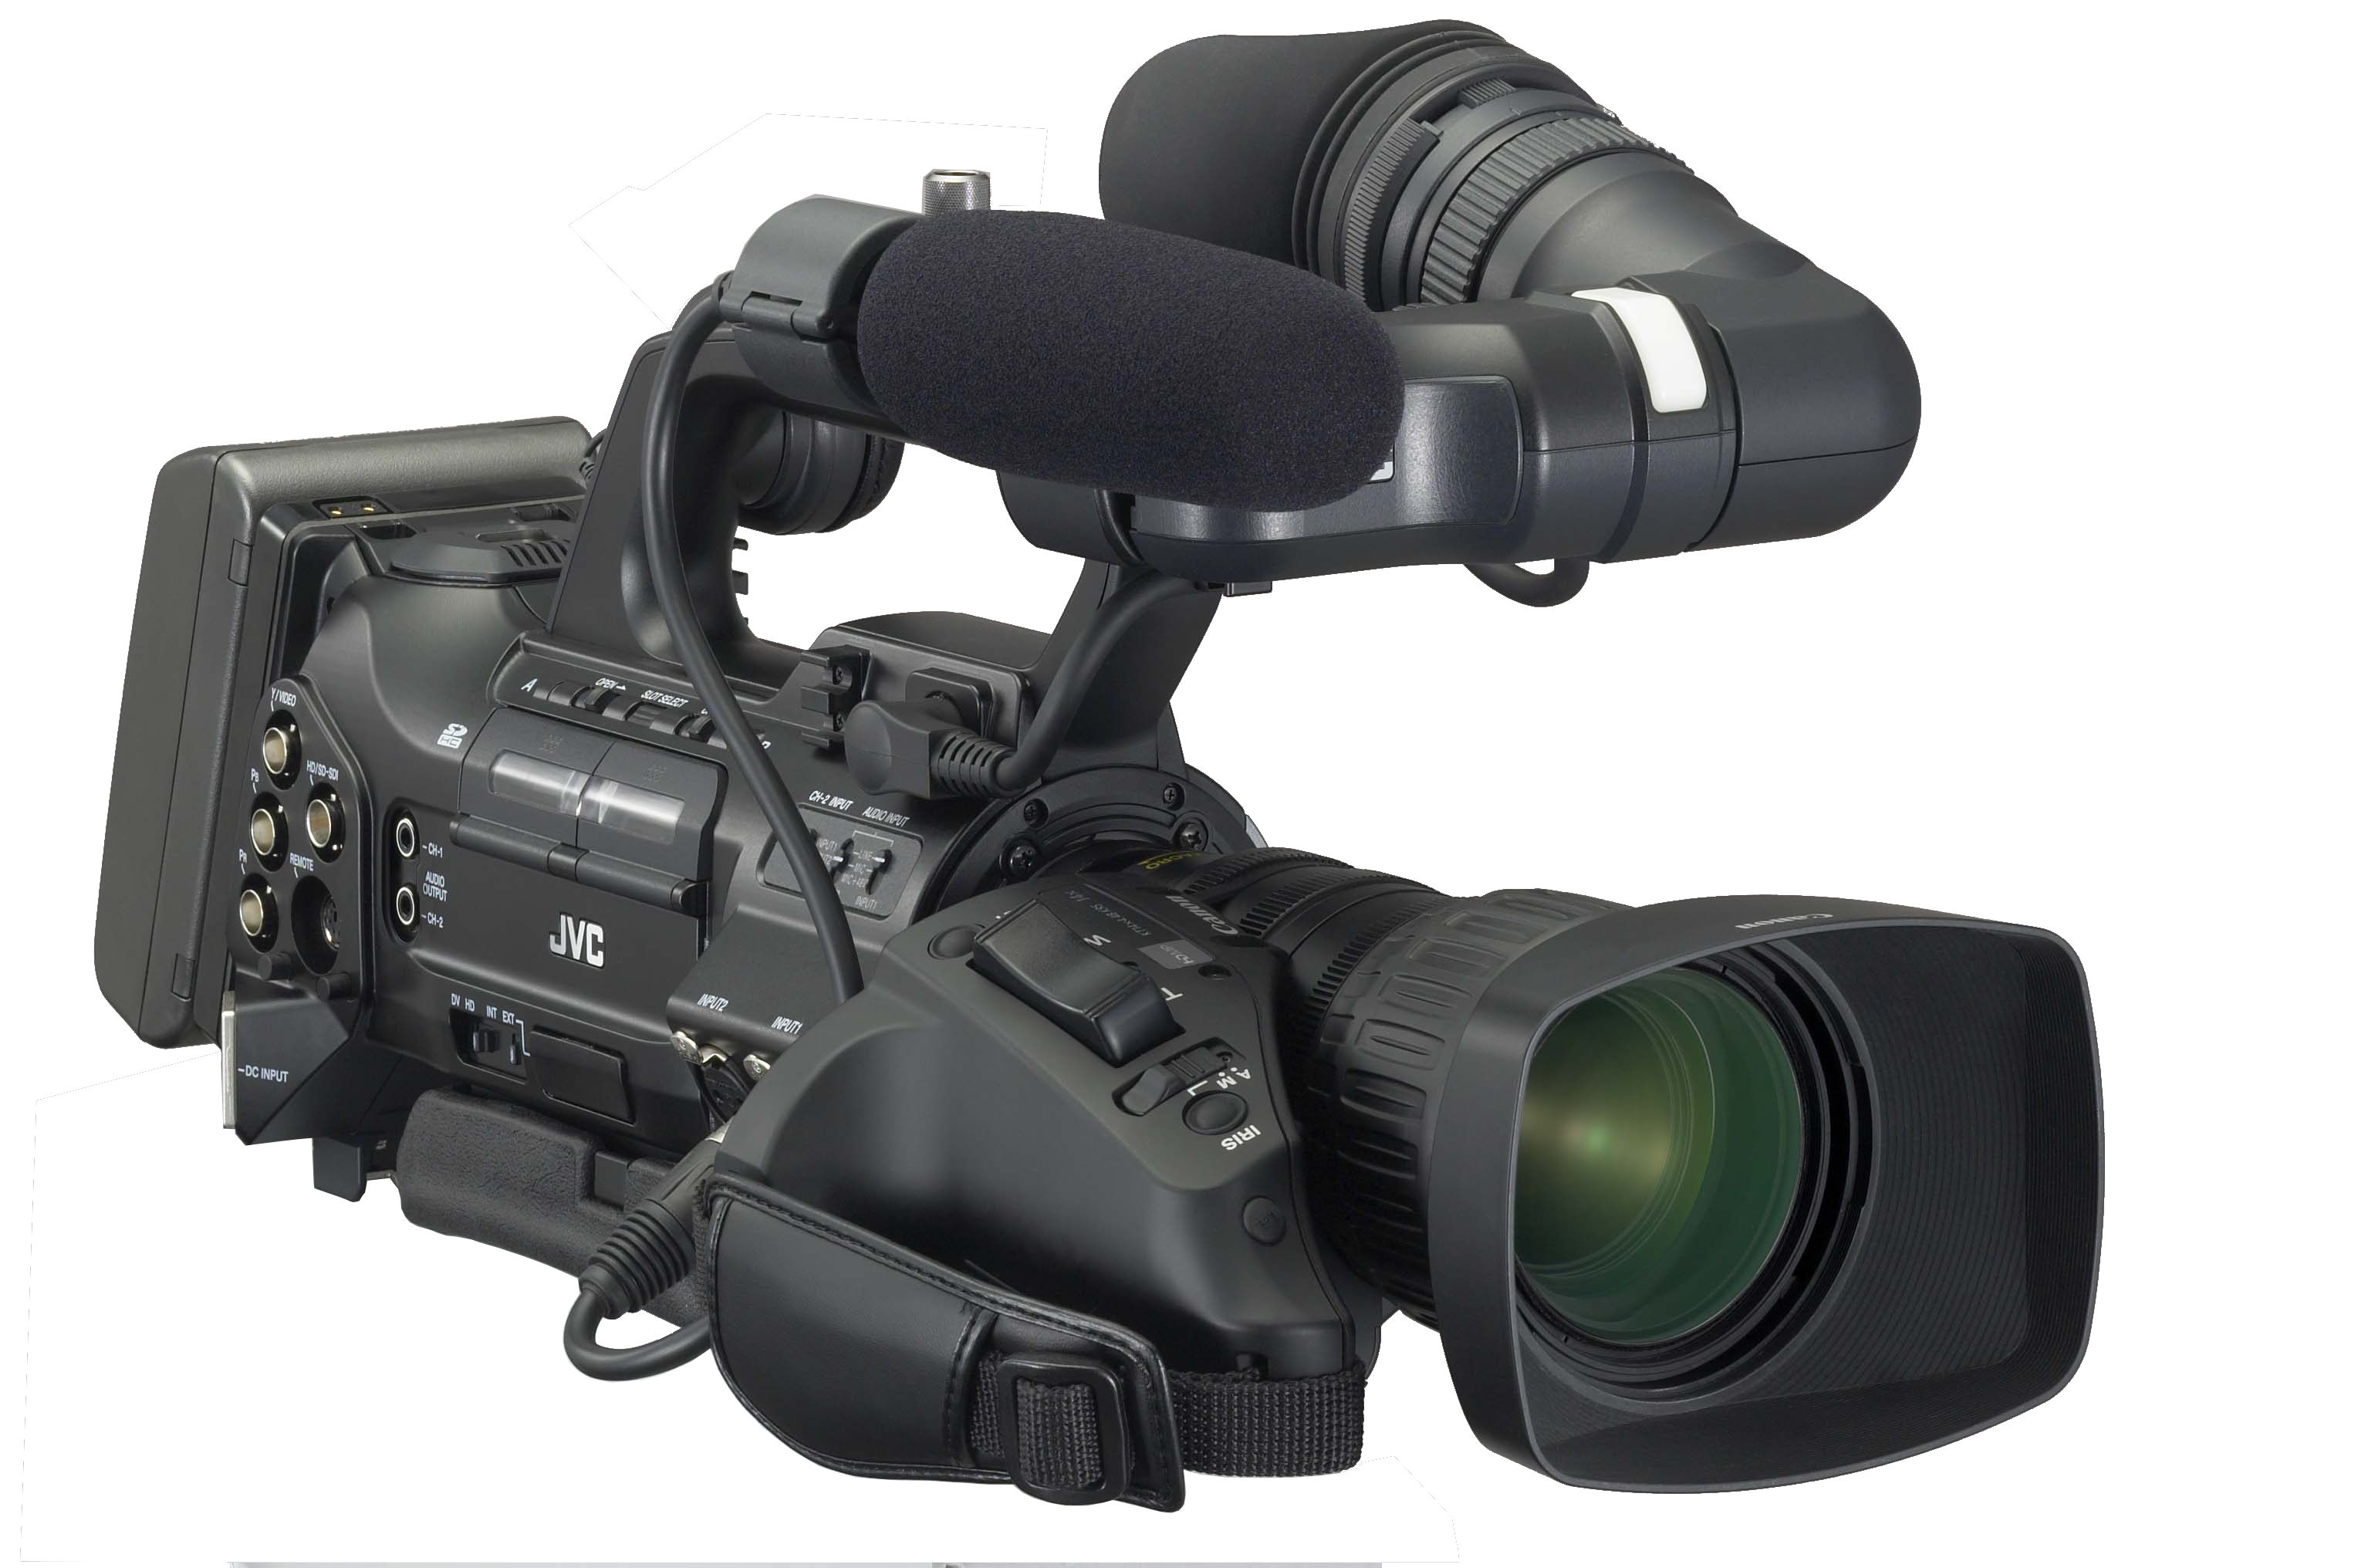 Thar she blows, JVC's first dip into the ever growing area of SSD HD cameras. A market which was been flooded in the past year by Sony's HDV and XDCAM alongside the original professional offerings from Panasonic's P2 platform.
The biggest news on this model is native recording of native quicktime .mov files onto the SDHC card format - so there's even less transfer time as no transcoding needs to take place to get the files working in FCP. This is in comparison to the MPEG Transport Stream format that many of the other options in this market will write to. You'll also be interested to hear that this is the first model that JVC have released with SXS support, a few months ago we learnt that JVC and Sony were working together on the format - and here's the proof. It's not a standard feature on the camera, like the XDCAM EX range, but an add-on unit that you buy separately (Known as the KA-MR100 dockable media recorder) Allowing you to record the same video to both your SDHC and SXS cards providing an instant digital backup, this gives the camera a total current capacity of 128GB on-board memory. It also boasts an interchangeable lens system (1/3" Bayonet mount), HD & SD SDI, Component and XLR connectivity.
I'm looking forward to getting my hands on this camera and following up on the quality and ergonomics of the unit, which will hopefully happen at BVE next week, so I'll do a follow up with my thoughts when we're back. Meanwhile, check the links for the press release and full specifications:
Tech specs: http://pro.jvc.com/prof/attributes/specs.jsp?model_id=MDL101851&feature_id=03
Press release: http://news.creativecow.net/story/861284
Friday 30 January 2009
Consumer BluRay production

Blu-ray. It 'won' the war, they're in HMV, and people actually have blu-ray players - or PS3s - in their home. The big thing that the video industry (excluding the major production and picture houses) have been waiting for is the capability to make consumer BD-R video discs with the same ease and functionality they're used to with DVD-R. The main reason it hasn't happened as quickly as the masses demanded is down to the players being able to read the BD-R and BD-RE disc format as anything other than data - the Blu-ray association basically waited to release the code for the firmware to allow this, keeping the premium on blu ray production higher for as long as possible.
This is all changing now as most new set top players are listing BD-R and BD-RE as compatible formats (Alongside AVCHD on DVD-DL, but thats another matter altogether) enabling discs produced with pro software such as Encore and Sonic DVDit to work just like the blu-rays produced by the big production houses. Well, nearly...to have the highest specification blu-ray disc, with all the features, you're looking at many thousands of $$$ for the enterprise level software (Sony BluPrint for example ) various licenses and replication fees (Outlined here and here) But I'm not really concerned with that level of production here, the links here and at the bottom will explain that area of the industry much better.
What I'm concerned about is the thousands of people who've been investing in HD cameras, workflow and monitoring with no route to deliver these beautiful projects on anything but the web or down-converted SD DVD. The time has come for this delivery to be a reality on optical disc format, and its much easier than you might expect. The workflow is nearly the same (especially with Encore) and the burners are no more expensive than DVD-RWs when they were first released. The major concern for people should be ensuring the colour monitoring is accurate as the HD TVs are much less forgiving than SD. Also the format you export to needs to be a legal BD format otherwise you'll introduce another step of compression. The best option for newcomers to this area would be to let your software do the transcode for you. The final thing to consider is when delivering Blu-ray discs to clients make sure the player they're using is compatible with the type of disc you've produced.
For much more detailed information on this feel free to have a read of the following articles, but the long story short: You can burn your own HD Blu-ray discs and watch em with relative ease.
http://www.discmakers.com/community/resources/Edge/2008/dvdvsbluray.asp
http://digitalcontentproducer.com/workflow/bluray_blues/
http://www.eventdv.net/Articles/ReadArticle.aspx?ArticleID=38059
http://www.dv.com/features/features_item.php?articleId=196602808
http://www.blu-raydisc.info/
http://www.sonycreativesoftware.com/blurayauthoring
Wednesday 28 January 2009
Upgrading your colour monitoring - An Intro
Colour monitoring and grading is big business, especially when you start talking about TV, film and DVD/BD production - but where to start? When to start? Is it important for you? Hopefully this and the follow up posts will help answer a few of those questions...
The extent to which you should improve your setup is defined, on one side, by the accuracy and level of broadcast-safe colour required for your final productions and on the other is your own personal aims for the quality of the finished product. For instance, if your projects will only ever be exported to the web then video monitoring isn’t a huge issue as you’ll be seeing the same pixel arrangement and bad colour calibration on every computer monitor, but if you do invest in the quality then it will still be appreciated and noticed by the viewer. This becomes more of a creative decision to grade and monitor your edit properly. When you enter the realm of film, DVD production or TV Broadcast it becomes much more critical that your colours are monitored by a proper production panel to ensure they fall within the 'safe' requirements of the broadcast world and the best consistency with the vast number of different TV screens and cinema systems out there.
There are a number of different levels you can consider for your video monitoring; the basic method would be using a low-cost standalone HDMI card . This gives you a precise HDMI colour space and will send a proper HD video signal into the monitor. This would be coupled with Sony’s entry level LMD production monitor, the 2030W, which has composite, component and HDMI inputs as standard. Up from this you can look at HDSDI, the standard professional I/O connection for HD, which will give you the best quality monitoring for any HD video but increases the cost considerably. The route to go down here really depends on the scope of your final productions delivery and the quality required for colour grading and compositing.
At this point the decisions really do require proper consultation if you're not clued up on the differences between the levels and quality of kit available for production monitoring. I'll follow up this post with some more technical information on this biz soon, but for now, thats your intro. If you'd like to talk further about this please contact me via broadcast at jigsaw 24 . com
Wednesday 7 January 2009
RAID GEEK ALERT
y = no. of chassis
z = number of discs in RAID after parity taken away
a = capacity of disc
b = percentage loss when formatting volume
((((y*2)-1)*z)*a)-b) = usable capacity
Or, if its a basic raid
(Total TB pre format - 1) * size of disks - 10% = Usable Capacity
With thanks to Sammy Aindow...
z = number of discs in RAID after parity taken away
a = capacity of disc
b = percentage loss when formatting volume
((((y*2)-1)*z)*a)-b) = usable capacity
Or, if its a basic raid
(Total TB pre format - 1) * size of disks - 10% = Usable Capacity
With thanks to Sammy Aindow...
Tuesday 6 January 2009
Can't launch color? Open GL error ?
Then you've got a video card sending a desktop signal. If its blackmagic:
When launching Color, you might see the error Unable to initialize OpenGL. Make sure Video Desktop is disabled.
Color is attempting to use the DeckLink card or Multibridge as if it were a regular graphics card and then reports the OpenGL error because it is not designed for that purpose.
To solve the problem, go in to the System Preferences and then DeckLink and then choose the option to Disable the Desktop after a restart. Restart your Mac and you will be able to launch Color
If its AJA:
Go to your AJA control panel, go to the output tab and ensure that your default output is set to black or test signal - not extended desktop
Monday 5 January 2009
Can't mount your D/R800 Sonnet RAID?
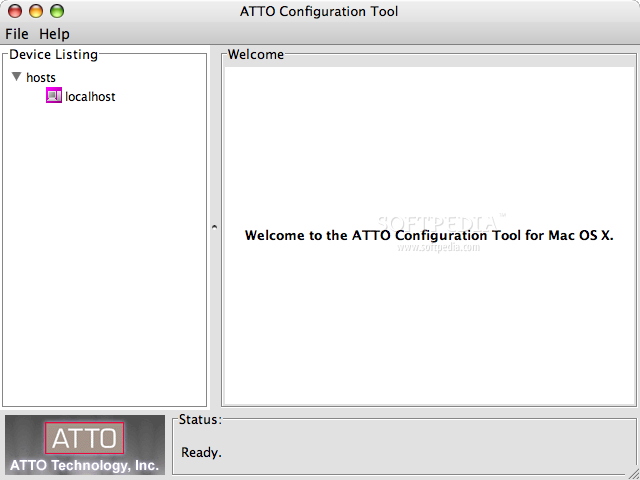 If you've got past reinstalling the ATTO drives and config software, can see all your drives and RAID group in the RAID tab of the config tool, try right clicking on the RAID group and selecting AUTO MAP.
The RAID should now be seen in disk utility where you can mount and partition it.
Subscribe to:
Posts (Atom)